• Skip to primary navigation
  • Skip to main content
  • Skip to footer

Lone Star Blondie

  • Home
  • About
  • Recipes
    • Breads
    • Breakfast & Brunch
    • Cakes & Cupcakes
    • Candy
    • Cookies, Bars & Brownies
    • Pies, Tarts & Cobblers
    • Puddings, Ice Creams & More
  • Baking Resources
  • Contact
You are here: Home / Archives for Recipe

Recipe

Banana Bread

March 12, 2020 by Sydney

Banana bread is a staple in my house. My kids love it, my husband loves it, I’ll eat an entire loaf in one day. Ok, maybe that was just one time when I was pregnant, but it happened and I am not ashamed! It’s just so darn good! Not to mention that it’s incredibly easy to make. Anyone can do it. This recipe has been my go-to for awhile now. It’s simple, moist and full of banana flavor. To give it some extra oomph, try adding some toasted walnuts that have been chopped. You could even add chocolate chips for a really indulgent treat.

Banana Bread

I love baking banana bread when I have company coming over. The aroma it gives off when it’s baking is so mouth-wateringly good! It fills your home with warmth and just pure joy. Your guests won’t be able stop themselves from commenting on how good your house smells.

Banana bread is fantastically versatile. Serve it up warm with butter for breakfast or with a scoop of vanilla ice cream for dessert. Have it as a snack for a mid-day pick me up. Sneak it when your kids aren’t watching because you don’t want to share.

Banana Bread

How to Make This Easy Banana Bread

It’s important that you use very ripe bananas. You want that sweetness that only an overripe banana can give you. Mash them to your liking. Some people leave big banana chunks, others pulverize them till they’re a thick banana soup. I tend to go somewhere in the middle with a few small chunks here and there.

  • Get your oven preheating to 350° and spray a loaf pan with non-stick spray . You can also use butter if you prefer.
  • Combine flour, baking soda, baking powder, salt and cinnamon in a bowl and set aside.
  • In another bowl, cream your butter and sugar together with a hand mixer. I like to use the creaming method because it gives this bread a lighter feel. If you prefer your banana bread to be more dense then use melted butter.
  • Add your mashed bananas, egg, sour cream and vanilla to the butter/sugar mixture. Mix until everything is well combined.
  • Lastly, add in the dry ingredients. Stir just until the you can’t see the flour anymore. Pour it into your pan and bake for about an hour.
Banana Bread

That’s it! Easy and delicious. Now sit back, relax and try not to eat it all at once. Or do, no judgement here!

Banana Bread

Banana Bread

Yield: 1 loaf
Prep Time: 10 minutes
Cook Time: 1 hour
Total Time: 1 hour 10 minutes

This easy, incredibly moist banana bread is full of banana flavor. It will quickly become a staple in your house!

Ingredients

  • 2 cups all purpose flour
  •  1 tsp baking soda
  • 2 tsp baking powder
  • 1/4 tsp salt
  • 1/4 tsp cinnamon
  • 1/2 cup butter, softened
  • 3/4 cup sugar
  • 3 overripe bananas, mashed
  • 1 egg
  • 1/2 cup sour cream
  • 2 tsp vanilla

Instructions

  1. Preheat your oven to 325°. Spray a loaf pan with non-stick spray.
  2. Combine flour, baking soda, baking powder, salt and cinnamon in a bowl. Set aside.
  3. In a large bowl, cream butter and sugar until light and fluffy. Mix in mashed bananas, egg, sour cream and vanilla until well combined.
  4. Add in the dry ingredients, stir just until the flour is no longer visible. Pour into prepared loaf pan.
  5. Bake for 50-60 minutes, or until a tootpick comes cleanly out of the center.

Notes

Want muffins instead? Bake these in a muffin tin for about 20-25 minutes.

You use greek yogurt as a substitute for sour cream.

© Sydney
Category: Breads

This post contains affiliate links. I only recommend products that I use and love. As an Amazon Associate I earn from qualifying purchases at no extra cost to you.

Easy Cherry Turnovers
These cherry turnovers are a quick and easy brunch (or anytime) treat! Bursting with cherry goo and glazed with a
Citrus Sugar Cookies
Are you in the mood for a sweet treat that's bursting with citrusy goodness? Look no further than these delightful
4 Easy Cookie Recipes to Make With Your Kids!
Looking for ways to keep your kids busy while we're all stuck at home? These 4 easy cookie recipes are
Blueberry Muffins
Blueberry muffins are one of my husband’s favorite breakfast treats. I think our 2 year old is quickly following in
Pumpkin Spice Macarons
These pumpkin spice macarons are the perfect fall treat. The warming spices and fall flavors in the shells pair perfectly
Strawberry Easter Cookies
These Strawberry Easter Cookies are a fun change from a traditional cut out sugar cookie. Made from real strawberries, their
« Previous 1 2 3 4 Next »
Yum

Mint Chocolate Shamrock Cookies

March 5, 2020 by Sydney

St Patrick’s Day is right around the corner and these Mint Chocolate Shamrock Cookies were the perfect excuse for me to use my new shamrock cookie cutter! They’re easy, minty, chocolatey, and super adorable. Best of all, you don’t have to be a pro to decorate them! With just a simple royal icing, dyed green of course, and a food color marker, you too can create cookies that are too cute to eat.

Mint + chocolate, probably my favorite flavor combo. Every year when Spring rolls around I get a powerful hankering for it. I blame the girl scouts (aka cookie crack dealers) and their Thin Mint pushing ways. So for these cookies I changed up my No Spread Sugar Cookie recipe to indulge my mint chocolate craving.

How to Make Mint Chocolate Shamrock Cookies

  • Combine cocoa powder, flour, baking powder and salt into a medium sized bowl. I like to add 2 tablespoons of dark cocoa powder in addition to the regular cocoa powder to bring an even deeper, richer chocolate flavor. If you don’t have any, or aren’t a fan of dark cocoa powder feel free to leave it out.
  • In the bowl of your stand mixer, cream the butter and sugar. Once that’s light and fluffy, add in the egg, vanilla extract and peppermint extract.
  • Add in the flour mixture 1/3 at a time, mixing in between. Once the flour has been completely mixed in, shape the dough into 2 discs and wrap in plastic wrap. Chill in the fridge for about 30 minutes.
  • After it’s been chilled, roll it out on a floured surface and cut the cookies with a shamrock cutter (or any other cutter you’d like). Bake in a 350° oven for about 10-12 minutes. Once cooled, decorate with royal icing.

Do you have a favorite flavor combo? Leave a comment below and let me know!

Mint Chocolate Shamrock Cookies

Mint Chocolate Shamrock Cookies

Yield: about 3 dozen cookies
Prep Time: 15 minutes
Chill Time: 30 minutes
Cook Time: 10 minutes
Total Time: 55 minutes

These super cute Shamrock Cookies are perfect for St. Patrick's day! Their full of mint chocolate goodness that will keep you coming back for more!

Ingredients

Cookies

  • 2 & 2/3 cup all purpose flour
  • 1/3 cup cocoa powder
  • 2 tbsp dark cocoa powder, optional
  • 1 tsp baking powder
  • 1/2 tsp salt
  • 1 cup butter, softened
  • 1 cup sugar
  • 1 egg
  • 2 tsp vanilla extract
  • 1 tsp peppermint extract

Royal Icing

  • 2 cups confectioners sugar
  • 2 tbsp meringue powder
  • 1/2 tsp vanilla extract
  • 4 tbsp water

Instructions

Cookies

Combine flour, cocoa powder, baking powder and salt in a medium sized bowl. Set aside

In the bowl of your stand mixer, cream butter and sugar until light and fluffy. Add egg and both extracts. Mix until well combined.

Add in flour mixture 1/3 at a time, mixing well in bwteen each addition. Once flour mixture is fully incorporated, shape dough into 2 discs and cover with plastic wrap. Chill for at least 30 minutes.

Preheat oven to 350°.

On a floured surface, roll out chilled dough to about 1/4 inch thickness. Cut with cookie cutter and place onto a lined cookie sheet. Bake for about 10-12 minutes. Cool completely

Royal Icing

Combine confectioners sugar, meringue powder, vanilla and water into the bowl of your stand mixer. With the whisk attachment, mix on medium high until stiff peaks form.

© Sydney
Category: Cookies, Bars & Brownies

This post contains affiliate links. I only recommend products that I use and love. As an Amazon Associate I earn from qualifying purchases at no extra cost to you.

White Cupcakes
White Cupcakes
These white cupcakes are light, fluffy and incredibly moist. From weddings and birthday parties to midnight snack attacks, they are
Blueberry Muffins
Blueberry muffins are one of my husband’s favorite breakfast treats. I think our 2 year old is quickly following in
Valentine's Day Cookies and a Lesson on Royal Icing
Valentine's day is coming up soon and these super cute Valentine's Day cookies are the perfect treat for your sweetie!
Strawberry Easter Cookies
These Strawberry Easter Cookies are a fun change from a traditional cut out sugar cookie. Made from real strawberries, their
Easy Peanut Butter Fudge
This quick and easy peanut butter fudge recipe is packed with peanut butter flavor to keep you coming back for
Banana Bread
Banana bread is a staple in my house. My kids love it, my husband loves it, I'll eat an entire
« Previous 1 2 3 4 Next »
Yum

Baileys Milkshake

February 27, 2020 by Sydney

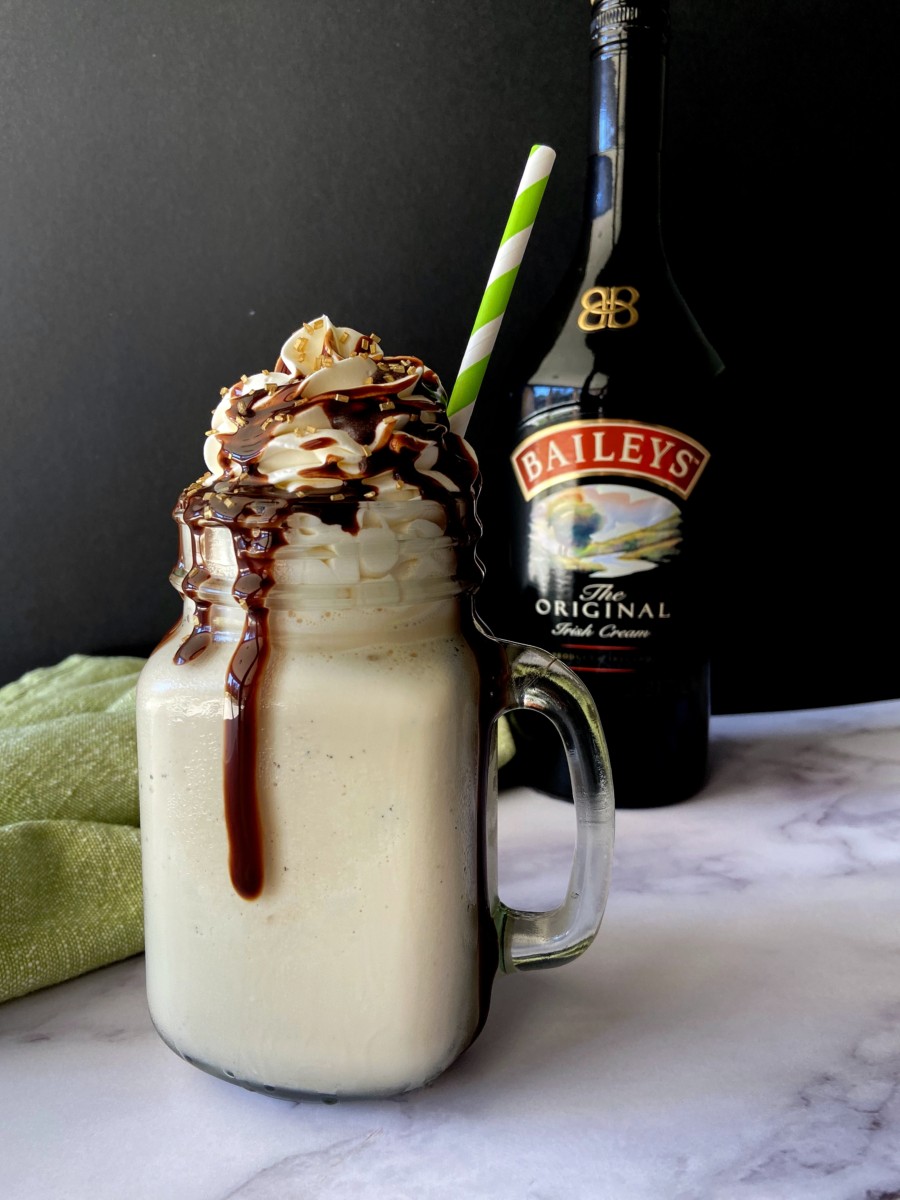
St. Paddy’s Day is right around the corner and this Baileys Milkshake is sure to be a hit at any party. It’s a fun, boozy, grown-up treat that is so easy to make. With just 2 simple ingredients, you’ll be whipping some up and celebrating in no time!

Baileys Milkshake

A few years ago, my husband and I went to Vegas with some friends of ours. They introduced us to this fun little casino/pub inside the Linq hotel called O’Shea’s. The atmosphere was so much fun! They have a drink on their menu called Frozen Baileys. Let me tell you, it is delicious. I had one everyday of our trip. I loved that drink so much that I wanted to find a way to recreate it at home.

So I took inspiration from my days working at a 50’s style burger joint in high school where I made countless milkshakes during my 3 years there. As a milkshake pro, I know the secret to a good milkshake is the perfect liquid to ice cream ratio. I like my milkshakes thick so my perfect ratio is 1/4 cup of liquid for every 2 cups of ice cream.

This shake is so simple to make. I just put 5 big scoops (about 2 cups) of vanilla ice cream and 1/4 cup of Baileys into a blender (my Vitamin is my favorite thing ever! You can find it here). Then I let it blend until it was smooth. That’s it! So easy! To make it extra fun and festive, I topped it with some whipped cream, chocolate sauce, and a few gold sprinkles because I’m fancy like that.

My Favorite Whipped Cream Recipe:

  • 1 cup heavy cream
  • 2 tbsp sugar
  • 1 tsp vanilla
  • Mix with a hand mixer (I use this one) until stiff peaks

Now, I love me some Baileys. I drink it straight, over ice when I want a little boozy treat. You can definitely taste the booze in this shake, but if you feel like 1/4 cup is too much for you, then just substitute a little bit of milk for some of it.

Baileys Milkshake

Baileys Milkshake

Yield: 1 shake (about 16 oz)
Prep Time: 5 minutes
Total Time: 5 minutes

This fun, boozy, grown-up milkshake is an easy decadent treat for any celebration!

Ingredients

  • 5 big scoops (about 2 cups) of vanilla ice cream
  • 1/4 cup Baileys Irish Cream

Instructions

Put the ice cream and Baileys into a blender. Blend on medium speed until smooth.

Top with whipped cream and chocolate sauce to make it even more festive!

Enjoy!

© Sydney

This post contains affiliate links. I only recommend products that I use and love. As an Amazon Associate I earn from qualifying purchases at no extra cost to you.

Chocolate Peanut Butter Chip Cookies
These Chocolate Peanut Butter Chip Cookies are the perfect combination of sweet and salty. Totally drool worthy and everyone will
Strawberry Easter Cookies
These Strawberry Easter Cookies are a fun change from a traditional cut out sugar cookie. Made from real strawberries, their
Easy Pecan Pie
Grandmommy's Easy Pecan Pie
Can you believe 2019 is over? The year came and went faster than I could blink an eye. 2019 was
Easy Cherry Turnovers
These cherry turnovers are a quick and easy brunch (or anytime) treat! Bursting with cherry goo and glazed with a
apricot bars
Granddaddy’s Apricot Bars
These apricot bars are simple, packed with flavor and easy to whip up. The sweet fruity filling combined with the
The Perfect Vanilla Cake
Say hello to the best vanilla cake ever! It's so moist and fluffy that you won't believe it's made completely
« Previous 1 2 3 4 Next »
Yum

The Perfect Vanilla Cake

February 22, 2020 by Sydney

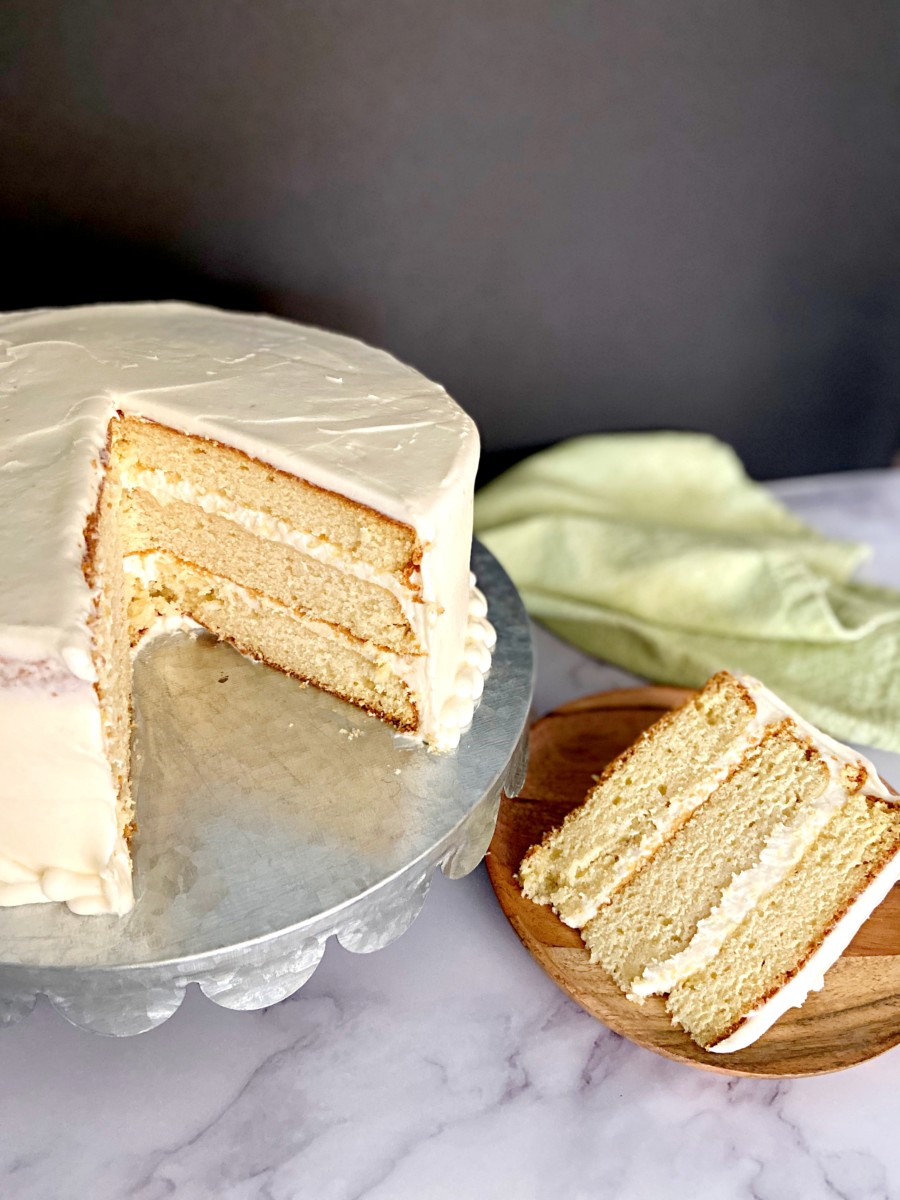
Say hello to the best vanilla cake ever! It’s so moist and fluffy that you won’t believe it’s made completely from scratch. So say good-bye to box mixes and give this recipe a try. It’s perfect! I think you’ll love it!

The Perfect Vanilla Cake

Vanilla cake, my nemesis. For many years I struggled with making vanilla cakes. They were always too dense, too dry and too blah. But after many failed attempts and recipes changes, I’ve come up with, what I believe, is the perfect vanilla cake. It’s stick-to-your-fork moist, fluffy and packed with vanilla flavor.

I believe everyone needs a good vanilla cake recipe in their baking arsenal. This recipe is now my go-to. It’s perfect to use as a base for any kind of cake you want to make. Add a fun twist like fruit or candy, switch the vanilla extract for a different flavoring, put some bacon in it (oh, idea brewing!), the possibilities are endless!

I recently made this cake for my daughter’s first birthday party. It was the first time I had made it for anyone other than my husband and kids, so I was little nervous about what everyone would think of it. Let me tell you, it was a hit! I almost didn’t get a piece!

Getting ready for a party is hectic at my house so I wanted to make sure that I had plenty of time to setup. I decided to make the cake the night before. It was getting late so I put off decorating it till the next morning. To keep it from drying out, I just wrapped each layer in plastic wrap and stuck it in the fridge overnight. The next morning, I whipped up a simple vanilla buttercream and dyed it a pale pink. Frosted it, covered the top in gold sanding sugar and piped a quick braided border. I made sure to let it sit out for a couple of hours before serving so that it could come up to room temperature. It tasted like I had just made it and it looked so cute with the rest of the decorations I spent a week making!

How to Make the Perfect Vanilla Cake

The method for making this cake is so simple. Just the basic creaming method!

  • Combine the dry ingredients and set them aside.
  • Cream the butter and sugar.
  • Add in the eggs one at a time, then add the sour cream and vanilla.
  • Lastly, alternate adding the dry ingredients and the milk. Starting and ending with the dry.
  • Bake it for 20-30 minutes

I frosted this cake with my husband’s favorite, cream cheese frosting. It’s got a great tang to it and it’s not as sweet as your typical American Buttercream. Not a fan of cream cheese frosting? That’s ok! Top it with any kind you like! This cake is versatile so you really can top it with any type and any flavor frosting!

The Perfect Vanilla Cake

The Perfect Vanilla Cake

Yield: 1 - 8 inch Round Cake
Prep Time: 15 minutes
Cook Time: 30 minutes
Total Time: 45 minutes

This is the vanilla cake recipe you've been looking for! It's light, fluffy and stick-to-your-fork moist!

Ingredients

Cake

  • 3 cups all-purpose flour
  • 2 tsp baking soda
  • 2 tsp baking powder
  • 1/2 tsp salt
  • 1 & 1/2 cups sugar
  • 1 cup butter, softened
  • 2 eggs
  • 1 cup sour cream
  • 1 tbsp vanilla
  • 1 cup whole milk

Frosting

  • 2 - 8-oz bricks of cream cheese, softened
  • 2 sticks of butter, softened
  • 6 cups of powdered sugar
  • 1/4 tsp salt
  • 2 tsp vanilla

Instructions

Cake

  1. Preheat oven to 350°
  2. Grease and flour 3 8-inch round cake pans.
  3. Combine flour, baking soda, baking powder and salt in a medium sized bowl and set aside.
  4. In the bowl of your stand mixer, cream the butter and sugar until light and fluffy.
  5. Add the eggs, one at a time and mixing well inbetween. Add the sour cream and vanilla and mix until well blended.
  6. Starting with the dry and ending with the dry, alternate adding the dry ingredients and the milk a little at a time.
  7. Pour batter evenly into prepared pans. Bake for 25-30 minutes, or until a toothpick comes out clean from the center.
  8. Let it cool and frost with your favorite frosting.

Frosting

  1. In the bowl of your stand mixer, cream the cream cheese and butter until light and fluffy.
  2. Add the sugar one cup at a time until well mixed.
  3. Add the salt and vanilla, mix on medium for 5 minutes.

Enjoy!

Notes

If you like your layers a little bit on the thick side, bake this in 2 8-inch round pans instead of 3.

For a make ahead option, you can bake the cakes, wrap them in plastic wrap once cooled and place them in the fridge. Or you can bake, cool and frost then place in the fridge. Let it sit out for a couple of hours before serving.

Blueberry Muffins
Blueberry muffins are one of my husband’s favorite breakfast treats. I think our 2 year old is quickly following in
Easy no spread sugar cookies
No Spread Sugar Cookies
These sugar cookies are the perfect base for all of your creative cookie projects. They hold their shape to insure
Lemon Macarons
These bright and citrusy lemon macarons are the perfect little treat for any occasion! The combination of tart lemons and
Banana Bread
Banana bread is a staple in my house. My kids love it, my husband loves it, I'll eat an entire
Easy Cherry Turnovers
These cherry turnovers are a quick and easy brunch (or anytime) treat! Bursting with cherry goo and glazed with a
Quick and Easy Banana Pudding
Banana Pudding is one of my favorite desserts. It's rich, creamy, light and fluffy. I can't help but smile when
« Previous 1 2 3 4 Next »
Yum

Texas Sheet Cake

February 14, 2020 by Sydney

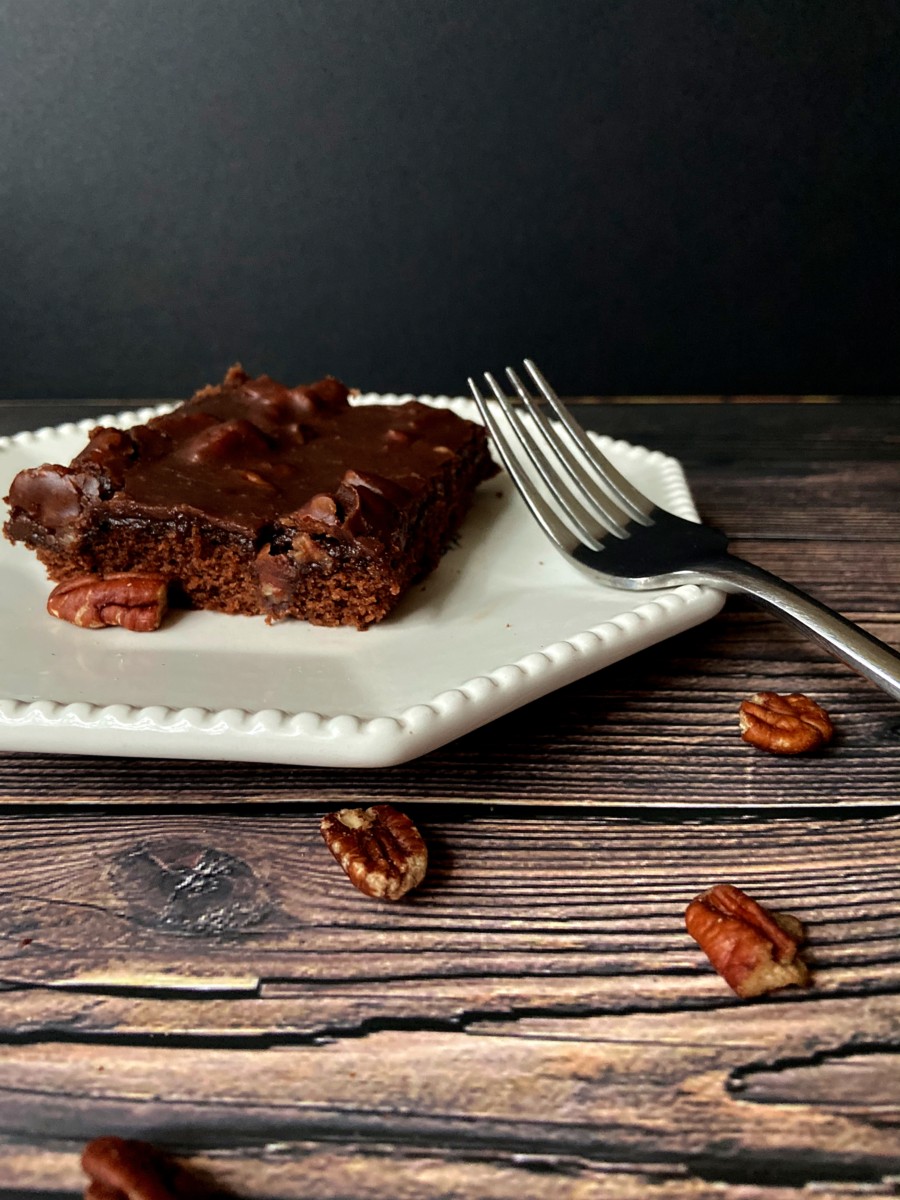
Let’s talk about Texas Sheet Cake! Why is it called Texas Sheet Cake? No one really knows, but one thing is for sure, this sucker is HUGE! After all, everything is bigger in Texas.

Moist. Rich. Chocolatey. All words I would use to describe this cake. On top of all that, it’s super simple to make and it feeds a crowd. What could be better?

How to make the best Texas Sheet Cake ever

  • Start by melting the butter in a medium sauce pan. Once its melted, add in the coffee, water and cocoa powder. Bring it to a boil. This helps “bloom” the cocoa, punching up the chocolatey flavor. Remove it from the heat once it starts to boil. Set aside.
  • Dump the flour, sugar, salt and baking soda into a large bowl and mix it all together. Grab the butter/cocoa mixture and pour it over the flour mixture. Stir.
  • Combine the buttermilk, eggs and vanilla. I do this in a large measuring cup so that I can just pour it right in without getting another bowl dirty.
  • Add the buttermilk mixture to the flour/cocoa mixture and stir till its thoroughly combined.
  • Pour it into a greased 13×18 inch sheet pan and bake for 20 minutes at 350°.
  • While the cake is baking, toast up your pecans and make the frosting. For the frosting, melt butter in a saucepan. I use the same one that I melted the butter in for the cake so that I don’t have to wash 2 pans. Stir in the cocoa and turn off the heat. Add milk, vanilla, powdered sugar and salt. Stir until combined. Add the toasted nuts. Pour the hot mixture over your cake as soon as it is out of the oven.

Doesn’t that look so good! I must admit, I have a weakness for chocolate. I’m not ashamed to say that I easily ate half of this cake on my own over the course of a week. Cake for breakfast anyone?

Texas Sheet Cake

Texas Sheet Cake

Yield: one HUGE cake
Prep Time: 15 minutes
Cook Time: 20 minutes
Total Time: 35 minutes

Moist, rich and chocolately! This easy sheet cake is perfect for a crowd, or just for yourself. No judgement.

Ingredients

For the Cake

  • 1 cup butter
  • 1/3 cup cocoa powder
  • 3/4 cup coffee
  • 1/4 cup warm water
  • 2 cups all purpose flour
  • 2 cups sugar
  • 1 tsp baking soda
  • 1/2 tsp salt
  • 1/2 cup buttermilk
  • 2 eggs
  • 1 tsp vanilla

For the Frosting

  • 3/4 cup butter
  • 1/3 cup cocoa powder
  • 6 tbsp milk
  • 3 cups powdered sugar
  • 1 tsp vanilla
  • pinch of salt
  • 1 cup toasted pecans, roughly chopped

Instructions

Cake


Preheat oven to 350°. Grease a 13x18 inch baking sheet.

In a medium sized saucepan, melt butter. Add coffee, water and cocoa powder. Stir and bring to a boil. Remove from heat.

Combine flour, sugar, salt and baking soda in a large bowl. Pour in the butter/cocoa mixture and stir to cool.

Combine buttermilk, eggs and vanilla in a large measuring cup or medium sized bowl. Add to flour/cocoa mixture. Stir to combine.

Bake for 20 minutes.

Frosting


Toast the pecans and roughly chop them.

In a medium sized saucepan, melt butter. Add cocoa, stir until combined and turn off the heat. Add milk, powdered sugar, vanilla and salt. Stir to combine. Fold in the nuts.

Pour hot frosting mixture over hot cake as soon as it comes out of the oven.

Enjoy!

apricot bars
Granddaddy’s Apricot Bars
These apricot bars are simple, packed with flavor and easy to whip up. The sweet fruity filling combined with the
Blueberry Muffins
Blueberry muffins are one of my husband’s favorite breakfast treats. I think our 2 year old is quickly following in
Pumpkin Spice Macarons
These pumpkin spice macarons are the perfect fall treat. The warming spices and fall flavors in the shells pair perfectly
Valentine's Day Cookies and a Lesson on Royal Icing
Valentine's day is coming up soon and these super cute Valentine's Day cookies are the perfect treat for your sweetie!
Mint Chocolate Shamrock Cookies
St Patrick's Day is right around the corner and these Mint Chocolate Shamrock Cookies were the perfect excuse for me
Easy no spread sugar cookies
No Spread Sugar Cookies
These sugar cookies are the perfect base for all of your creative cookie projects. They hold their shape to insure
« Previous 1 2 3 4 Next »
Yum

Lemon Macarons

February 6, 2020 by Sydney

These bright and beautiful macarons are bursting with lemony flavor

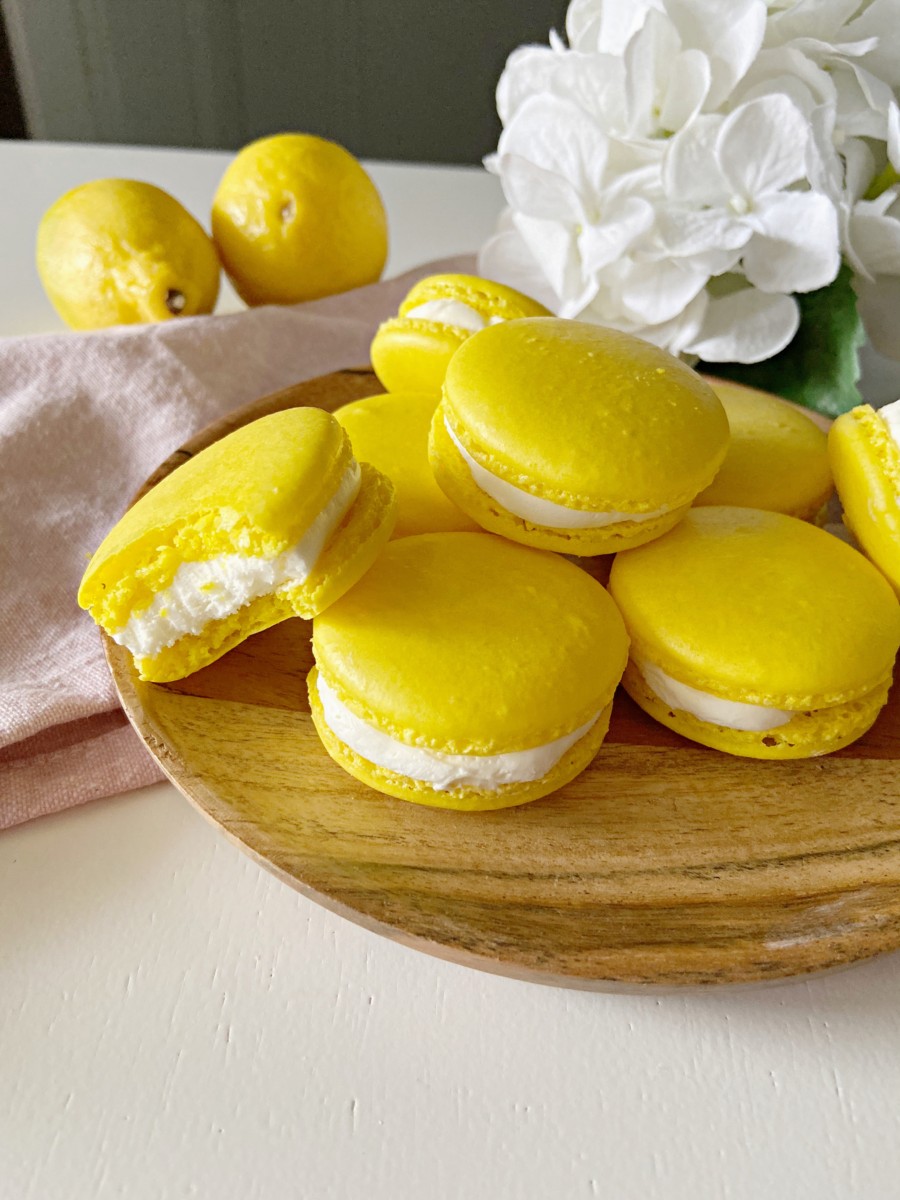
These bright and citrusy lemon macarons are the perfect little treat for any occasion! The combination of tart lemons and the sweetness form the sugar will make your taste buds oh so happy. Give them a try!

Tricky Little Guys

Although they were intimidating at first, macarons have quickly become one of my favorite treats to make. They’re adorable and always impressive. They can be finicky though. The pictures below are from the same batch of macarons. The ones on right were baked first and I was a little impatient so I put them in the oven while it was still preheating. It had gotten to 320° so I thought it would be ok. Boy was I wrong. The shells on the left were piped using the same batter, out of the same bag, but my oven was preheated to the right temp. Lots of things can go wrong with macarons but if I can master them then so can you. They are oh so worth it when you do.
What’s in a macaron?

A basic macaron is made with 5 simple ingredients:

  • Almond flour, which is really just finely ground almonds. You can buy them pre-ground or do it yourself in a food processor. I make macarons quite often so I just buy a big bag of it at Costco and stick it in the fridge to keep it fresh.
  • Powdered sugar, aka confectioner’s sugar
  • Aged egg whites. Age your egg whites by separating them from the yolk and putting them in a covered bowl in the fridge for 24-48 hours. I used to try and skip this step but I have more success when I take the time to do it.
  • Caster sugar. This is just superfine white sugar. If you don’t have any or can’t find it at the store, you can make your own by grinding up white sugar in a coffee grinder or food processor. I will admit, I have been know to use regular, granulated white sugar in my macarons and they have turned out beautifully.
  • Cream of tartar. This helps stabilize the meringue.

These bright and beautiful macarons are bursting with lemony flavor

How to make lemon macarons

  • Measure out each ingredient with a kitchen scale. You’ll have more success if you use exact measurements.
  • Sift the powdered sugar and almond flour together into a bowl. Set this aside. Do not skip this step. Sifting ensures that the macarons will have smooth tops.
  • Whip the egg whites in the bowl of your stand mixer with the whisk attachment. Once they are frothy, add the cream of tartar. When the whisk starts leaving trails in the egg whites, add the sugar 1/3 at a time.
  • Beat until stiff peaks are formed. You want the peaks to stand upright, without falling back on themselves when you pull the whisk out.
  • Add in yellow food coloring, either gel or powdered works best. Liquid changes the consistency of the batter so you want to refrain from using it in your macarons. Personally, I prefer gel.
  • And now, the most important part of the process, the macaronage…

These bright and beautiful macarons are bursting with lemony flavor

Macaronage, folding in the dry ingredients

Start this step by gently folding in about 1/3 of your dry ingredients with a rubber spatula until they’re well combined. Next, add in the rest of your dry ingredients and the lemon zest. Fold them in by swooping your spatula around the bowl and down the middle in a “J” shape. Keep folding until the batter starts to flow like molten lava. You’ll know you’re done when you can lift the spatula out of the bowl and the batter slowly flows off in a continuous ribbon. One method I’ve seen all over the internet is to make a figure 8 with the batter. If you can do the entire 8 in a continuous stream then it’s ready.

  • Line two cookie sheets with either silpats or parchment paper. Without them your macarons will stick and be impossible to get off. Trust me, I’ve tried.
  • Pour the batter into a piping bag fitted with a large round piping tip.
  • With the tip pointing straight down, gently pipe out 1 1/2 inch circles. Stop squeezing and flick your wrist in a circular motion before pulling away. This will help keep the tops smooth.
  • Tap the cookie sheets on your counter to release any air bubbles that might be hiding. Poke any bubbles that don’t pop with a toothpick.
  • Let the macarons rest until they no longer stick your finger when gently touching them. I usually start checking after about 15 minutes. It’s pretty humid in the part of Texas I live in so some days this can take up to an hour for me.
  • Once they are no longer sticky to the touch, put them in a 325° oven, one sheet at a time, for about 10-15 minutes. Check for doneness by gently (there is a common theme here) pressing on the side of a cookie. It should not move. If it does, add another minute or 2 and check again.
  • Let them cool before taking them off the tray. Fill with your favorite filling. I used a lemon swiss meringue buttercream for these bad boys.

Troubleshooting

Don’t worry if you don’t get them right the first time. You’re lucky if you do! My first batch ever was a disaster and I consider myself a pretty good baker. They didn’t have feet and half of them were cracked. but you know what, they still tasted good and my hubby gobbled them up. Just keep practicing and you will surprise yourself. Indulgewithmimi.com has a fantastic tutorial and troubleshooting guide for making macarons. I referred to her site many times when I was learning to make these. In fact, her ingredient ratios are what I use as the base for all of the macaron recipes I make. I just tweek them to suit whatever flavor I’d like. I highly recommend checking her site out.

Lemon Macarons

Lemon Macarons

Prep Time: 30 minutes
Cook Time: 15 minutes
Additional Time: 30 minutes
Total Time: 1 hour 15 minutes

These bright and beautiful macarons are bursting with lemony flavor!

Ingredients

Shells

  • 130 grams almond flour
  • 130 grams powdered sugar
  • 90 grams caster sugar
  • 100 grams aged egg whites
  • 1/4 teaspoon cream of tartar
  • zest of 1 lemon
  • yellow food coloring (optional)

Lemon Swiss Meringue Buttercream

  • 2 egg whites
  • 1/2 cup sugar
  • pinch of salt
  • 3/4 cup softened butter
  • zest of 1 lemon
  • 1/4 cup lemon juice

Instructions

Shells

  1. Line 2 cookie sheets with either silpats or parchment paper.
  2. Sift almond flour and powdered sugar together into a bowl. Set aside.
  3. In a stand mixer with whisk attachment, beat egg whites until frothy. Add cream of tartar. beat until eggs start leaving trails. Add castor sugar 1/3 at a time. Beat until stiff peaks are formed.
  4. Pour 1/3 of dry ingredients into the egg whites. Fold until well incorporated. Add in the rest of your dry ingredients, the lemon zest and food coloring. Fold until the batter has reached a consistency similar to molten lava.
  5. Pipe out 1.5 inch circles onto lined cookie sheets. Tap on counter to release air pockets. Let rest until no longer sticky when gently touched. While resting, preheat oven to 325° F.
  6. Bake 1 sheet at a time for 10-15 minutes. Test for doneness by gently pressing on the side of the shells. They should not move.
  7. Cool and fill with buttercream, or desired filling.

Lemon Swiss Meringue Buttercream

  1. Whisk together eggs whites, sugar and salt in a bowl.
  2. Fill a pot with a couple inches of water and bring to a simmer.
  3. Place bowl with egg white mixture on top of the pot with simmering water. Whisk continuously until mixture reaches 160°.
  4. Transfer the mixture to the bowl of a stand mixer. With the whisk attachment, whip until the mixture cools to room temperature.
  5. Switch to the paddle attachment. With your mixer on low, add in the butter 1 tablespoon at a time. Make sure it is fully incorporated before adding the next.
  6. Add in the lemon zest and lemon juice. Beat until well combined.


Notes

Macarons are best when they’ve “matured” in the fridge for 24 hours (or at least overnight).

Age your egg whites by separating them and placing them in a container in the fridge for 24-48 hours.

Category: Cookies, Bars & Brownies

White Cupcakes
White Cupcakes
These white cupcakes are light, fluffy and incredibly moist. From weddings and birthday parties to midnight snack attacks, they are
4 Easy Cookie Recipes to Make With Your Kids!
Looking for ways to keep your kids busy while we’re all stuck at home? These 4 easy cookie recipes are
Citrus Sugar Cookies
Are you in the mood for a sweet treat that’s bursting with citrusy goodness? Look no further than these delightful
apricot bars
Granddaddy’s Apricot Bars
These apricot bars are simple, packed with flavor and easy to whip up. The sweet fruity filling combined with the
Valentine's Day Cookies and a Lesson on Royal Icing
Valentine’s day is coming up soon and these super cute Valentine’s Day cookies are the perfect treat for your sweetie!
Texas Sheet Cake
Let’s talk about Texas Sheet Cake! Why is it called Texas Sheet Cake? No one really knows, but one thing
« Previous 1 2 3 4 Next »

Valentine's Day Cookies and a Lesson on Royal Icing

January 30, 2020 by Sydney

Valentine’s day is coming up soon and these super cute Valentine’s Day cookies are the perfect treat for your sweetie! Keep reading to find out step by step how I made these!

Decorate your own super cute Valentine's Day Cookies!

Let’s get started!

First things first, we need cookies! I used my easy, no spread sugar cookie recipe for these beauties. Once you’ve made the cookie dough, form it into two discs and chill for at least an hour. After chilling, roll it out to about 1/4 inch thick and cut with your favorite heart shaped cookie cutter. Bake them at 350° F for about 7-10 minutes depending on the size of your cookies. Mine are about 4 inches by 4 inches and took 8 minutes for the bottoms to just start to brown. Pull them out once you see the bottom edges browning to keep the soft, chewy texture. Allow to cool completely before decorating.

Royal Icing

I use royal icing to decorate my sugar cookies. It’s easier than you think to get super cute cookies with royal icing. Here’s my recipe:

  • 4 cups powdered sugar
  • 3 tbsp meringue powder
  • 5 tbsp water
  • 1/2 tsp vanilla
  • 1/2 tsp almond extract

Sift powdered sugar and meringue powder into the bowl of your stand mixer. Add water, vanilla and almond extract. Mix on low until stiff peaks form. I like to cover my mixer with a kitchen towel before turning it on the keep the powdered sugar snow storm at bay. Store any unused icing in an airtight container at room temperature for up to 2 weeks. Just fluff it up with your mixer when you’re ready to use it.

Colors, colors, colors!

Next we need to color our royal icing and get it ready to work with. Separate the icing into different bowls for each color you plan on using. I used 3 colors so I used 3 bowls. For the red I used Wilton’s Christmas Red and Wilton’s Color Right System Crimson. For the black I used Wilton’s Black Black. For the white, I just left it alone. You can add white food coloring to make it even brighter but I’m lazy and was fine with the natural whiteness of the icing.

Consistency is key!

I like to add in a tiny bit of water along with the food coloring so that I can get my icing to the consistency I want to use. I use my 1/4 teaspoon to add the water, stirring between each addition. You can also use a spray bottle to add water. As I’ve said before, I’m lazy. I don’t make flood consistency icing. Gasp! Instead, I flood my cookies with what some people call 15 second icing. Basically it takes 15 seconds for it to smooth out. I like it because I can outline and flood with the same piping bag instead of 2! I left the black icing a little more stiff (think toothpaste consistency) because I would only be piping letters with it and I wanted them to hold their shape.

Decorating your Valentine’s Day cookies

Now that we have our colors sorted, it’s time for the fun part. Decorating! To get the look I made, outline and flood your cookies like the pictures above. Let that dry for about 10 minutes. Then add dots around the outside of your heart like in the picture below. Finally, write “love” in your black icing. Now, let those bad boys dry. I leave mine to dry on the counter overnight to make sure everything is good and set.

Decorate your own super cute Valentine's Day Cookies!

All it takes is a little practice! I find most people think they’re adorable even when all you see are your mistakes (I make plenty with every batch of cookies I decorate) so just have fun with it! They will be hit, I promise!

How to decorate your own Valentine's Day cookies with royal icing!

Valentine's Day Cookies and a Lesson on Royal Icing

Valentine's Day Cookies and a Lesson on Royal Icing

Texas Sheet Cake
Let's talk about Texas Sheet Cake! Why is it called Texas Sheet Cake? No one really knows, but one thing
Mint Chocolate Shamrock Cookies
St Patrick's Day is right around the corner and these Mint Chocolate Shamrock Cookies were the perfect excuse for me
Easy Peanut Butter Fudge
This quick and easy peanut butter fudge recipe is packed with peanut butter flavor to keep you coming back for
Chocolate Butterscotch Pie with a pretzel crust
This Chocolate Butterscotch Pie is dangerous. The combination of sweet butterscotch and salty pretzel will make your mouth sing. The
Easy Pecan Pie
Grandmommy's Easy Pecan Pie
Can you believe 2019 is over? The year came and went faster than I could blink an eye. 2019 was
Citrus Sugar Cookies
Are you in the mood for a sweet treat that's bursting with citrusy goodness? Look no further than these delightful
« Previous 1 2 3 4 Next »
The Perfect Vanilla Cake
Say hello to the best vanilla cake ever! It's so moist and fluffy that you won't believe it's made completely
Quick and Easy Banana Pudding
Banana Pudding is one of my favorite desserts. It's rich, creamy, light and fluffy. I can't help but smile when
Chocolate Butterscotch Pie with a pretzel crust
This Chocolate Butterscotch Pie is dangerous. The combination of sweet butterscotch and salty pretzel will make your mouth sing. The
Texas Sheet Cake
Let's talk about Texas Sheet Cake! Why is it called Texas Sheet Cake? No one really knows, but one thing
Easy Cherry Turnovers
These cherry turnovers are a quick and easy brunch (or anytime) treat! Bursting with cherry goo and glazed with a
apricot bars
Granddaddy’s Apricot Bars
These apricot bars are simple, packed with flavor and easy to whip up. The sweet fruity filling combined with the
« Previous 1 2 3 4 Next »
Yum

No Spread Sugar Cookies

January 23, 2020 by Sydney

Easy no spread sugar cookies

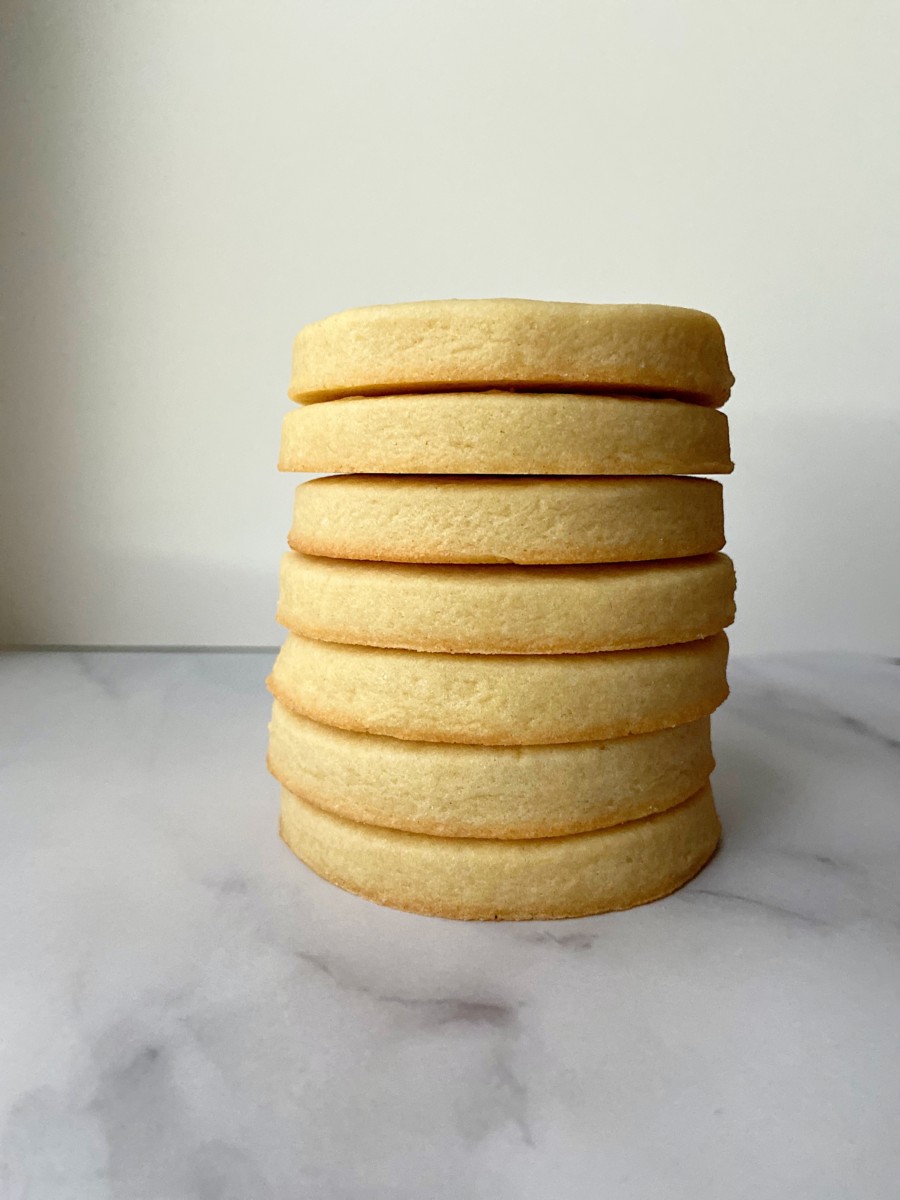
These sugar cookies are the perfect base for all of your creative cookie projects. They hold their shape to insure that your cookies come out just the way you want them to. The flavor is fantastic! They’ve got just the right amount of sweetness with subtle hints of vanilla and almond. You’re gonna love them!

Sugar cookies

How to make the perfect sugar cookies:

  • Mix the dry ingredients together in a medium size bowl. That’s the flour, salt and baking powder. Set this aside.
  • Cream the butter and sugar until well combined.
  • Add the egg and extracts to the sugar mixture. Mix well.
  • Mix in the flour mixture 1/3 at a time. I like to do it in batches because it combines with the sugar mixture a lot easier. It also ensures more even distribution.
  • Once everything is well combined, form the dough into 2 discs. Wrap with plastic and place in the fridge to chill for at least 30 minutes.
Sugar cookies

Chill baby, chill

Why chill the dough? Because we want our cookies to hold their shape! Nothing is worse than getting your dough mixed up and cut into the perfect shape only to have have it spread all over your pan in the oven. Been there, cried over that! I tried tons of “no chill” recipes and didn’t like any of them. Most of the ones I tried omitted the leavening agent, baking powder/baking soda, in order to keep the cookies from spreading. I found that they were too dense in the middle and not chewy enough for my liking. So I played around with different amounts of flour, leavening agents and sugar/butter ratios until I came up with the perfect combination. The key ingredient? Well it’s not really an ingredient at all. It’s the chill factor!

SO MANY FUN SHAPES!

My favorite part about sugar cookies is that there are endless possibilities for decorating! Any shape, size, color or style, you name it, it’s been a sugar cookie.

Easy no spread sugar cookies

No Spread Sugar Cookies

Prep Time: 15 minutes
Cook Time: 8 minutes
Additional Time: 30 minutes
Total Time: 53 minutes

These easy sugar cookies are perfect for all of your creative cookie projects! They hold their shape and taste fantastic!

Ingredients

  • 3 cups all purpose flour
  • 1 tsp baking powder
  • 1/2 tsp salt
  • 1 cup (2 sticks) softened butter
  • 1 cup sugar
  • 1 egg
  • 1 tbsp vanilla
  • 1/2 tsp almond extract

Instructions

Preheat oven to 350°

Mix together flour, baking powder and salt

Cream butter and sugar under well combined

Add egg, vanilla and almond extract. Mix.

Add flour mixture 1/3 at a time until well combined

Seperate dough into 2 discs. Chill for at least 30 mintutes

Roll out chilled dough on a floured surface to 1/4 inch thick. Cut into desired shapes.

Bake for 8-10 minutes, or until the bottom edges just turn golden

Enjoy!

Notes

Pull the cookies out when the bottom edges are just golden. Once the tops start to turn they are over done. Pulling them out before the tops turn brown ensures a nice, chewy center.

Category: Cookies, Bars & Brownies
4 Easy Cookie Recipes to Make With Your Kids!
Looking for ways to keep your kids busy while we're all stuck at home? These 4 easy cookie recipes are
Easy no spread sugar cookies
No Spread Sugar Cookies
These sugar cookies are the perfect base for all of your creative cookie projects. They hold their shape to insure
The Perfect Vanilla Cake
Say hello to the best vanilla cake ever! It's so moist and fluffy that you won't believe it's made completely
Citrus Sugar Cookies
Are you in the mood for a sweet treat that's bursting with citrusy goodness? Look no further than these delightful
Thick and Chewy Chocolate Chip Cookies
Looking for a great recipe for chocolate chip cookies? You’ve come to the right place! These cookies are  thick, chewy
Mint Chocolate Shamrock Cookies
St Patrick's Day is right around the corner and these Mint Chocolate Shamrock Cookies were the perfect excuse for me
« Previous 1 2 3 4 Next »

Yum

Blueberry Muffins

January 15, 2020 by Sydney

Moist and tender blueberry muffins

Blueberry muffins are one of my husband’s favorite breakfast treats. I think our 2 year old is quickly following in his footsteps. As I was making these he caught a glimpse and proclaimed “CAKE!”. Between the two of them, I barely had time to snap any photos. They scarfed down half of them within 15 minutes! 

The hunt for the perfect blueberry muffin

I’ve tried a lot of different muffin recipes over the years. I scoured Pinterest, saving pin after pin, in search of the perfect muffin. But alas, they’d all be too dense or too dry so I would move on and find a new recipe. Eventually I got tired of searching and decided to just “wing it”. After a few trial and error runs I managed to come up with a recipe that I was happy with. I lowered the amount of flour used and added sour cream to the mix which resulted in  muffins that are light, moist and bursting with blueberry flavor! 

How to make the best blueberry muffins ever!

These muffins are not only delicious, they are super easy to make too! Simply combine the dry ingredients in one bowl then mix the wet ingredients in another. Add the dry to the wet then dump in the blueberries. Scoop the batter into your muffin tin and bake till they’re golden! Store any left over muffins in a an airtight container.

Blueberry Muffins

Blueberry Muffins

Yield: 12 Muffins
Prep Time: 10 minutes
Cook Time: 20 minutes
Total Time: 30 minutes

These muffins are light, moist and bursting with blueberries! A family favorite that disappears in minutes!

Ingredients

  • 1 and 1/2 cups all purpose flour
  • 1/4 tsp salt
  • 1 tsp baking soda
  • 2 tsp baking powder
  • 3/4 cups sugar
  • 1 egg
  • 1/2 cup sour cream
  • 1/2 vegetable oil
  • 1/2 milk
  • 2 tsp vanilla
  • 1 cup frozen wild blueberries

Instructions

    Preheat oven to 400°F

    Spray a muffin tin with cooking spray, or line with cupcake liners

    Combine flour, salt, baking soda and baking powder. Set aside.

    In a large bowl, mix sugar, egg, sour cream, vegetable oil, milk and vanilla until well blended.

    Add the dry ingredients to the wet mixture 1/3 at time. Once all of the dry ingredients have been added and are well combined, stir in the blueberries.

    Spoon batter into prepared tin. Bake for 18-20 minutes, until a toothpick inserted into the center comes out clean.

    Enjoy!

Notes

I use frozen blueberries in this recipe because I like the smaller wild berries. I can't find them fresh where I live. Feel free to add fresh berries to your muffins! Just dust them in flour before adding to the batter to help keep them from sinking.

© Sydney
Category: Breakfast & Brunch
Pumpkin Spice Macarons
These pumpkin spice macarons are the perfect fall treat. The warming spices and fall flavors in the shells pair perfectly
Lemon Macarons
These bright and citrusy lemon macarons are the perfect little treat for any occasion! The combination of tart lemons and
Chocolate Peanut Butter Chip Cookies
These Chocolate Peanut Butter Chip Cookies are the perfect combination of sweet and salty. Totally drool worthy and everyone will
Strawberry Easter Cookies
These Strawberry Easter Cookies are a fun change from a traditional cut out sugar cookie. Made from real strawberries, their
Blueberry Muffins
Blueberry muffins are one of my husband’s favorite breakfast treats. I think our 2 year old is quickly following in
Easy Peanut Butter Fudge
This quick and easy peanut butter fudge recipe is packed with peanut butter flavor to keep you coming back for
« Previous 1 2 3 4 Next »
Yum

Thick and Chewy Chocolate Chip Cookies

January 8, 2020 by Sydney

Looking for a great recipe for chocolate chip cookies? You’ve come to the right place! These cookies are  thick, chewy and packed with chocolate! In fact, they’re so good that I had to make two batches just for this post because my husband (well, I) ate them all before I could get any pictures!

Thick and chewy chocolate chip cookies

Chocolate chip cookies are a baking staple. They are by far my favorite cookies of all time (one of the many dessert faves I have in common with my dad). Every good baker needs a go-to chocolate chip cookie recipe. When that craving hits this one is mine. It ticks all the boxes, warm, chewy, and most importantly, chocolatey. It’s the best chocolate chip cookie ever! They’re an old family favorite complete with a not-so-secret ingredient, cinnamon.

Thick and chewy chocolate chip cookies

What makes these chocolate chip cookies so special? 

  • Cinnamon. It warms up the flavor of these cookies and keeps you coming back for more. 
  • Melted butter. This is what gives the cookies that chew factor we all love.
  • Freezer time. Freezing after scooping will give us nice, thick cookies!
Thick and Chewy Chocolate Chip Cookies

Steps to Success:

  1. Start by melting the butter. You’re going to want it to cool down before you add the rest of the wet ingredients.
  2. Get your dry ingredients together. I just dump them in a medium sized bowl and mix with a fork.
  3. Now that the butter has cooled down, blend it with both sugars. Add the egg, the yolk, and vanilla and blend it till it looks like peanut butter.
  4. Add the dry ingredients. I find it’s much easier to blend them in if you only add about 1/3 of the dry ingredient mixture at a time.
  5. Now for the best part, chocolate chips! Just dump them in and mix with a spoon. Here’s a fun fact, I never measure the chocolate chips. I let my heart guide me. It usually comes out to around 2 cups (have I mentioned that I LOVE chocolate?). If that’s too much chocolate for you then add less. There are no rules here!
  6. Scoop the dough into balls. I usually scoop out about 2 tablespoons per cookie, but when I’m feeling dangerous I’ll scoop out 1/4 cup per cookie. Just add a little extra baking time for a larger cookie.
  7. This is important. Stick the scooped out dough in the freezer for about 30 minutes. This will insure that the cookies don’t spread too much in the oven. We want them thick!
  8. After the 30 minutes, pop them into a 325° F oven for about 15-18. Add a couple minutes if you scoop them big. Once the edges are golden brown, they’re good to go!
The Best Chocolate Chip Cookies

The Best Chocolate Chip Cookies

Prep Time: 30 minutes
Cook Time: 15 minutes
Total Time: 45 minutes

Warm, chewy, and most importantly, chocolatey. These really are the best chocolate chip cookies ever! They’re an old family favorite complete with a not-so-secret ingredient, cinnamon.

Ingredients

  • 2 cups all-purpose flour
  • 1/2 teaspoon baking soda
  • 1/2 teaspoon salt
  • 1/2 teaspoon cinnamon
  • 3/4 cup butter, melted
  • 1 cup brown sugar
  • 1/2 cup white sugar
  • 1 tablespoon vanilla
  • 1 egg
  • 1 egg yolk
  • 2 cups semisweet chocolate chips

Instructions

    Preheat oven to 325°F

    Add flour, baking soda, salt and cinnamon to a bowl. Mix together then set aside.

    In a large bowl, cream together the melted butter, brown sugar and white sugar until they are well blended. Add the egg, egg yolk and vanilla and beat until light and creamy.

    Mix in the dry ingredients, 1/3 at a time, until just blended. Stir in the chocolate chips using a wooden spoon.

    Scoop into balls and place in freezer for 15 minutes.

    Place chilled dough balls onto cookie sheet about 3 inches apart. Bake for 15-18 minutes or until edge are slightly golden. Cool on wire rack.

    Enjoy!

Notes

Stick the scooped out dough in the freezer for about 15 minutes. This will insure that the cookies don’t spread too much in the oven. We want them thick!

This recipe is great for making ahead. Place frozen balls into a ziplock bag and just bake them when you're ready. No need to thaw, just add an extra minute or two to your bake time!

© Sydney
Category: Cookies, Bars & Brownies
Pumpkin Spice Macarons
These pumpkin spice macarons are the perfect fall treat. The warming spices and fall flavors in the shells pair perfectly
4 Easy Cookie Recipes to Make With Your Kids!
Looking for ways to keep your kids busy while we're all stuck at home? These 4 easy cookie recipes are
Strawberry Easter Cookies
These Strawberry Easter Cookies are a fun change from a traditional cut out sugar cookie. Made from real strawberries, their
apricot bars
Granddaddy’s Apricot Bars
These apricot bars are simple, packed with flavor and easy to whip up. The sweet fruity filling combined with the
Thick and Chewy Chocolate Chip Cookies
Looking for a great recipe for chocolate chip cookies? You’ve come to the right place! These cookies are  thick, chewy
Baileys Milkshake
St. Paddy's Day is right around the corner and this Baileys Milkshake is sure to be a hit at any
« Previous 1 2 3 4 Next »
Yum
  • « Go to Previous Page
  • Page 1
  • Page 2
  • Page 3
  • Go to Next Page »

Footer

Follow Me

  • Email
  • Facebook
  • Instagram
  • Pinterest

Privacy Policy · COPYRIGHT © 2019–2025 Lone Star Blondie · Log in

Never miss a recipe!

×